It is most common to see pixelation when trying to resize a poor-quality picture or viewing a poor-quality image. A picture may become blocky in appearance when you magnify it too much. This deteriorates the overall impression of the picture you are now seeing. Fortunately, you can now repair photo to overcome pixilation in pictures.
Throughout this post, we’ll look at how you can fix pixelated image to avoid having a distorted or otherwise low-quality image resulting from the problem. Let us know here about image editor.
Common Ways to Fix Pixelated Images
You can use a handful of various approaches for this assignment, as detailed below.
Using Photoshop to Restore Pixelated Images
Photographic editor Photoshop is the uncontested king of image editing applications, but it costs a lot of money to purchase. While this program may improve your photographs, the fee is unquestionably justified. Although many Photoshop tools have a somewhat high learning curve, it merely takes a few seconds to restore pixelated images.
The following are the procedures to follow while attempting to correct a pixelated picture in Photoshop.
- Open your picture in Photoshop and make appropriate changes.
- Choose the ‘Blur’ and ‘Filter’alternatives.
- From the drop-down menu, select ‘Gaussian Blur’ and move the slider appropriately. Click ‘OK.’
- Choose ‘Filter’ and ‘Sharpen’ options.
- Select ‘Unsharp Mask’ and adjust the sharpness using the slider until it is appropriate. Once you’ve finished, click ‘OK’.
- Save the picture to your computer.
Fixing Pixelated Images Using Paint.net
Paint.net is a suitable option for pixelating photos to be fixed. You’ll need to follow these steps to make use of this tool.
- Open your picture in Paint.NET and make any appropriate adjustments.
- Select ‘Effects,’ ‘Blur,’ and ‘Gaussian Blur’ from the drop-down menu.
- Reduce the pixel impact by sliding the slider to the right.
- Select ‘Effects,’ ‘Photo,’ and ‘Sharpen’ from the drop-down menu.
- To find a suitable level, use the slider.
- Save the picture to your computer.
Using Mobile Apps to Fix Pixelated Photographs
Even though most smartphones come with good cameras capable of taking crisp and clear shots, sometimes we’ll have to repair blurry and pixelated photographs taken on our phones. Fortunately, various picture editing tools available that may be used to correct pixelated photos.
Listed below are some of the most valuable apps for fixing pixelated photos:
Afterlight: This is a photo-editing application that is simple and fast to use. It makes it simple to correct blurry photographs, and it comes with many options to assist you in improving the overall image quality.
Sharpen Image: This program was created exclusively to sharpen photographs. It comes with just two types of sliders – one for modifying the pixel size and the other for sharpening effects – it’s relatively straightforward.
Adobe Photoshop Express: Photo Editor Collage Maker — This tool is entirely free to use and offers many valuable functions, including the ability to make dark and grainy photos seem bright and vivid.
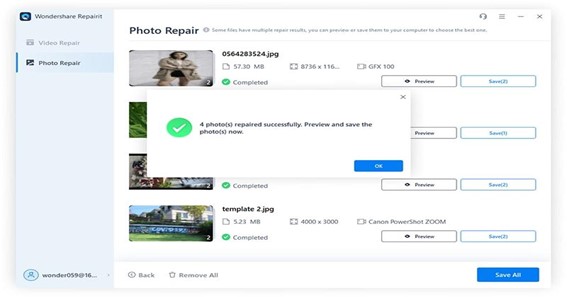
How to Fix Pixelated Images with Repairit
Wondershare Repairit can mend pixelated pictures as well as corrupted photographs. This program creates thumbnails of corrupted JPEG files and then restores them to their original place using a batch process.
The following are the procedures to follow to repair pixelated photos using Reairit.
Step 1: Download the JPEG repair program, install it, and run it.
Step 2: Pick “Add File” from the drop-down menu and select the corrupt JPEG/JPG files you want to repair. After that, a list of selected files will appear.
Step 3: To fix all of the files, select all from the Repair drop-down menu. Alternatively, select one favorite file.
![]()
Step 4: Choose the repair option to begin mending the files you chose.
Tips to Avoid Image Pixelation
The following tips will help you prevent pixelation in images.
Keep the Resolution in Mind
Always make sure that the resolution of the design is high enough to provide a buffer when increasing the output size of the design. A low-resolution picture may be appropriate for your web design project, depending on your needs. If you need to print out your plan, you’ll need a high-resolution image of the design.
Make Use of the Proper Image Format
Although more detailed and rich in color tones and clarity, Raster pictures are not appropriate when the output is vast, such as in the case of a billboard or any other sort of outdoor sign, since they lose clarity and detail as the image size increases. In these circumstances, pixelation will be immediately noticeable. You may prevent this by using vector graphics instead of bitmap ones for more significant printing.
Increase the Size of Your Images by Interpolating Them
Interpolation is a technique for enlarging your picture and adding more pixels adjacent to or around the current ones while keeping the colors consistent. The end consequence of this is that you will produce a non-pixelated picture. Several third-party picture libraries provide this service for a charge, but it is also possible to do it yourself with apps such as Adobe Photoshop.
Conclusion
An image that should be crisp and crystal clear shouldn’t display pixelation. In most cases, raster images tend to exhibit pixelation by nature. Therefore, use vector images if you intend to print larger images instead.
To Know Some Great Stuff Do Visit BioCaptions
To Know Some Great Stuff Do Visit BiosWikis
To Know Some Great Stuff Do Visit Caresclub